Even though there are stickers that let you create polls or make questions – check out some of the most popular Instagram hashtags to go with them – to your followers, among others, the sheer amount of possibilities is endless. Learning how to show the temperature on Instagram Stories is just another one of them. Whether you’re enjoying summertime in a nice beach or in some very unusual situations – such as snow in Texas -, you can show all about it to your friends and followers with the temperature sticker! Tip: to improve even more your profile, how about using more than the single link Instagram allows you to use on your bio? Go to AppTuts.bio right now and find out how!
How to enable GPS on Instagram?
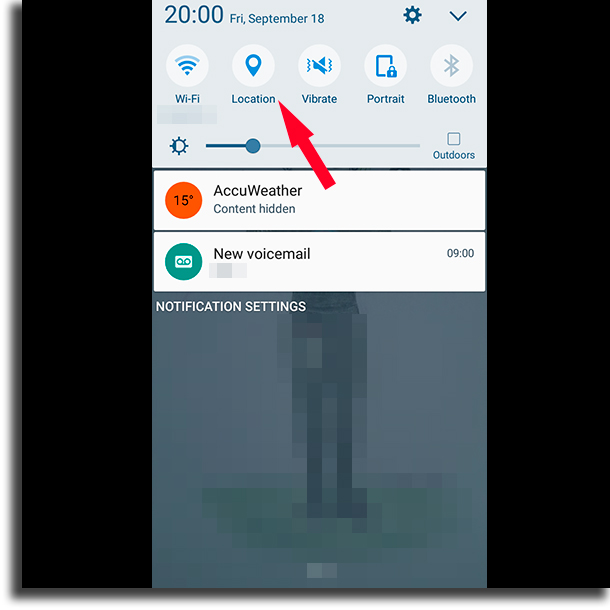
The only requirement for you to be able to show your local temperature on Instagram Stories is by letting the app get access to your location. To do so, you must first enable your smartphone’s GPS by opening the quick settings menu by swiping down from the top and press on the Location icon.
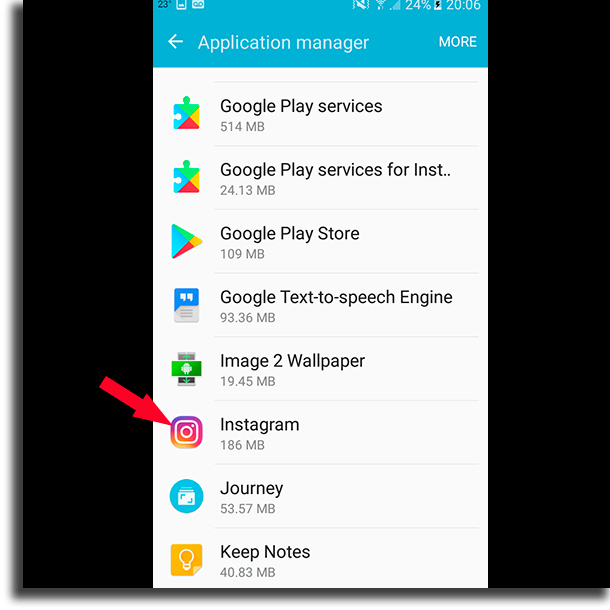
Tip: This tutorial is being made using a Samsung Galaxy J7, so your settings and ways to reach the settings may differ to your own device. However, they’re similar enough. Next, you have to let Instagram to get access to your location. If you have been using Instagram for a while, it is likely that this setting is already enabled. To enable it, you have to open the Settings app on your device and find the Applications menu; Now, follow until you find Instagram on your list;
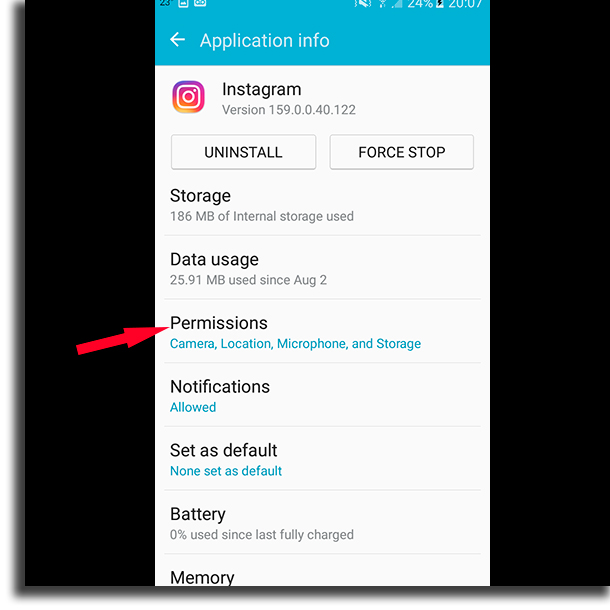
Open the Permissions menu;
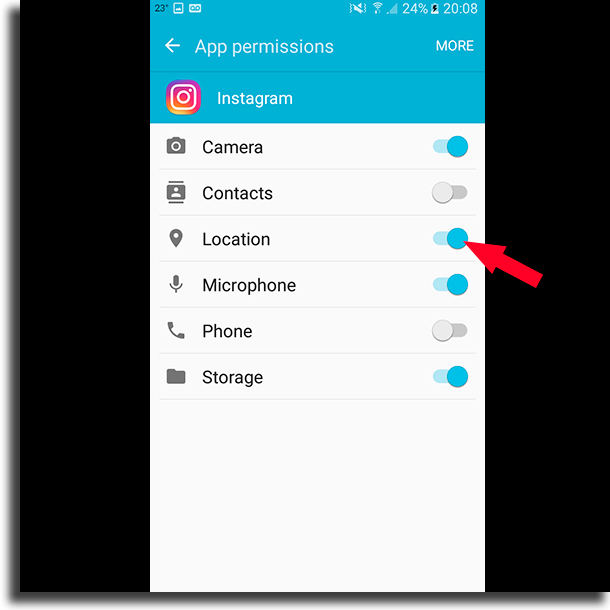
Finally, enable the Location option.
Done! Now you can start making your posts and learn how to show your temperature on Instagram Stories!
How to show the temperature on Instagram Stories
1 – Open Instagram and swipe to the right;
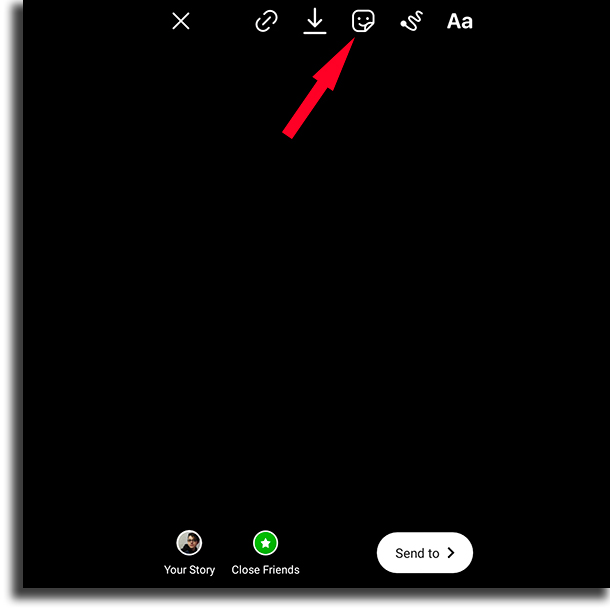
2 – Create a Story normally. In the edit screen, go to the stickers button;
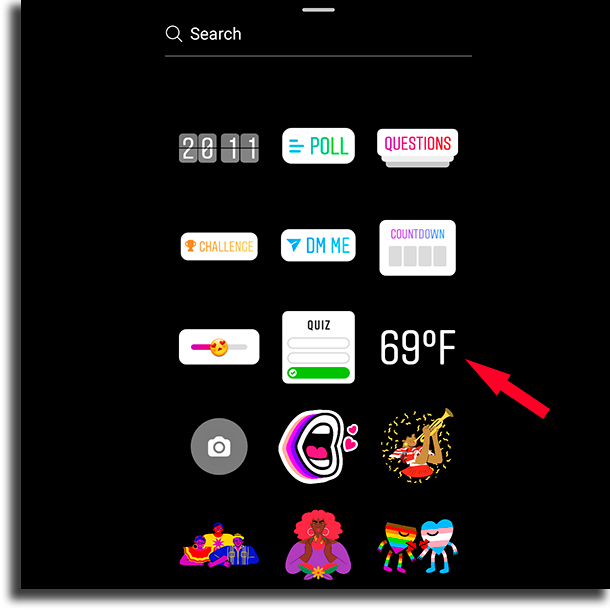
3 – Choose the icon that has a temperature measurement. Even before you add the sticker to your story, the accurate temperature (in Celsius or Fahrenheit) will be shown. Tap on it to show your temperature on Instagram Stories;
4 – You can easily swap between Celsius and Fahrenheit by tapping on the sticker, as well as showing the status of how the sky is, in a cycle;
5 – This is how you can show the temperature on your Instagram Stories. It is pretty simple, isn’t it? And, after having done this, you can also keep adding other stickers and editing your story as you wish. Click on Your story, on Close Friends, or on Send to to finish sharing your newest Instagram Stories!
Schedule your Instagram Stories!
Now that you have properly learned how to use the temperature sticker on Instagram to show it on your Stories, how about creating an editorial calendar to keep making content on Instagram and maybe even become an influencer? If that’s your goal, try checking out our Instagram bio ideas to use! To schedule or repost your Stories without having to create them at the exact time, the ideal thing is to use a post management app. StimSocial is one such app, and it is a perfect choice if you want to grow bigger quickly on Instagram! Other than being able to schedule posts for both your feed and your Stories, StimSocial also gives you insights, reports, and analytics about your profile, so that you can keep track of how well you’re performing. And just to top it off, StimSocial offers all new users a 5-day FREE TRIAL so that they (and you) can try out the platform! For that, simply follow this link and sign up.
